So you just purchased your first flash unit, and now its time to buy one of those flash modifiers you see plastered all over the internet or photography magazines. Hold off one second before you drop $30 to $40. First, take an hour or so and read about how to properly bounce your flash. However, every so often, you’ll run into a wedding or event venue where its impossible to bounce your flash because the ceilings are too high. The first indication that your ceiling is too high is if your unit is taking seconds to recycle instead of half a second.
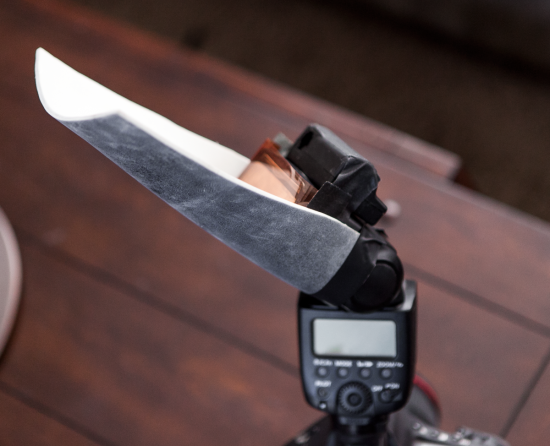
To combat high ceilings, I use a small piece of black foam. It works for two reasons. If pointed directly up, the foam modifier bounces some of the light forward into my subject before the rest of my flash’s light has time to bounce back, from whatever it may be hitting. Secondly, it gives me the ability to add direction to my light. If I bounce the light off a wall behind me, I may not want it spilling onto the floor and back up onto my subject.
You can pick up the foam at your local craft store for a few bucks. It’s not a special type of foam. To attach it to your flash unit, use some gaffers tape, hair bands, or even one of those plastic wrist bracelets. From there, you can rotate it around your flash head depending on the angle you need.
Update: Since I’ve been using the black foamie thingy more and more, I’ve since moved to a white piece of foam. The white has a higher reflective propery than the black, allowing it to be more effective. I then spray painted the back of it black, to help it blend in more with my equipment. Regardless, you’ll still get novice photographers asking what in the world you have on top of your camera. Below you can see a picture of the spray painted version.
